crochet tips

muestra-tension

¿Why it is so important to check gauge?

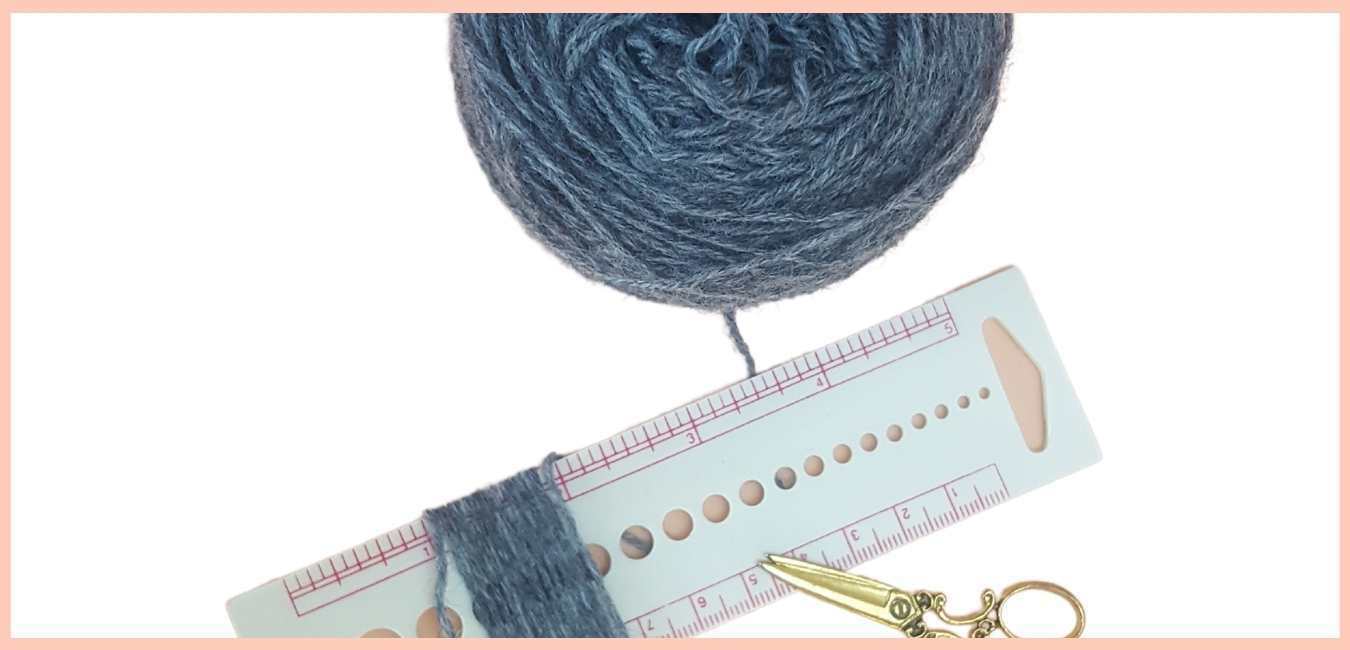
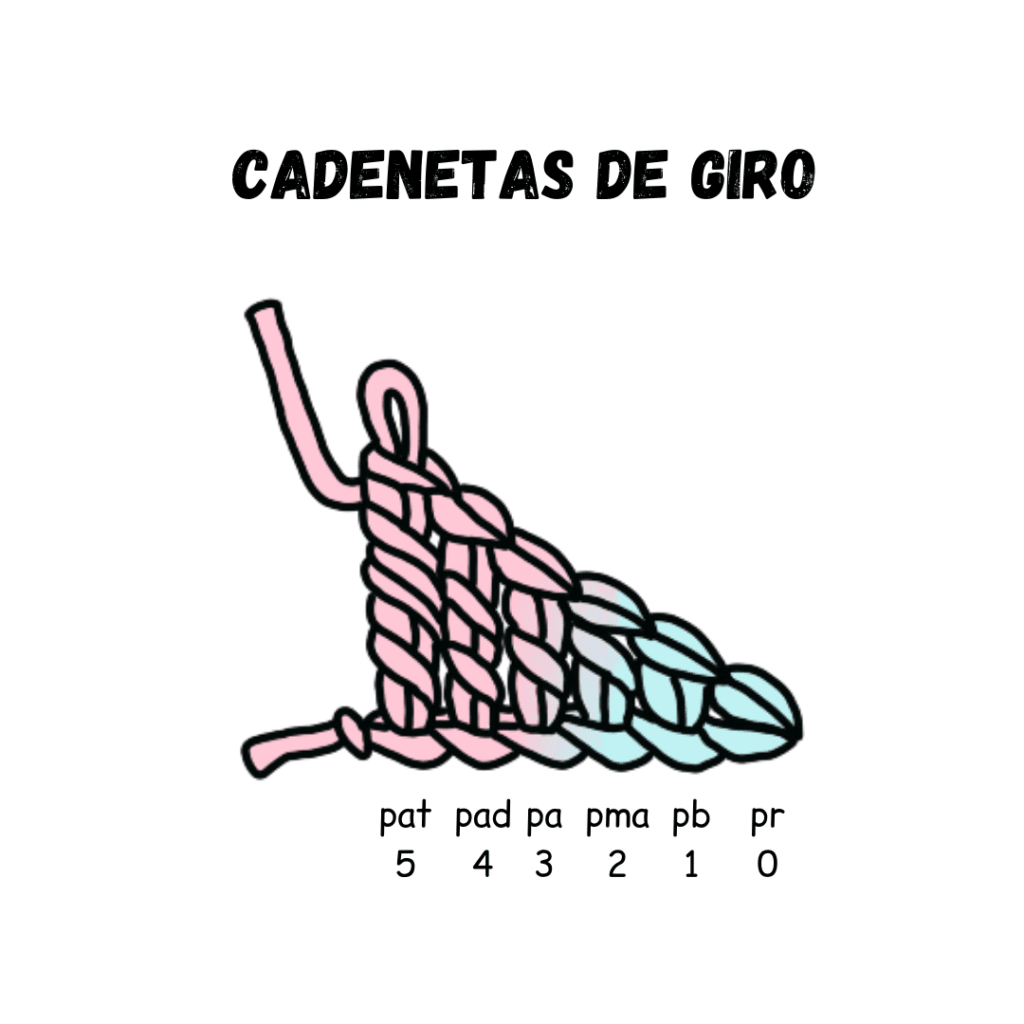
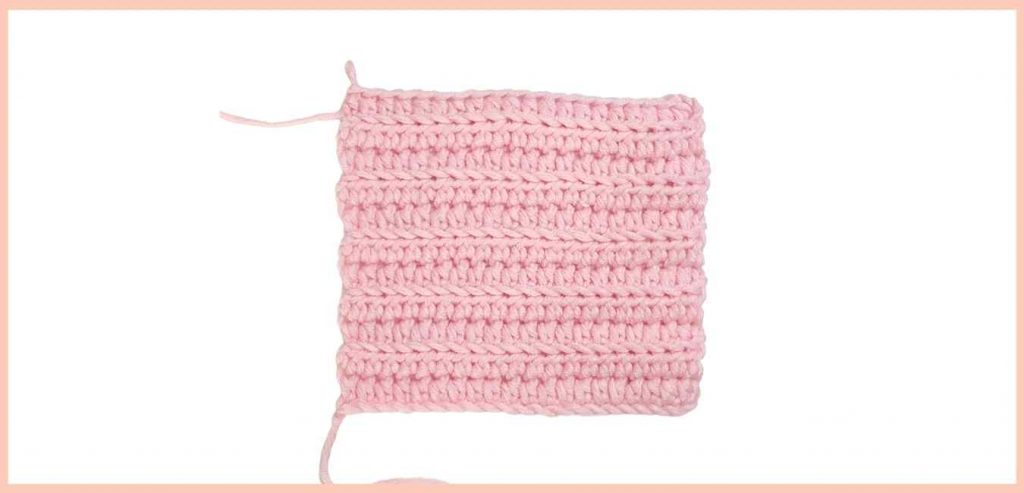
In a previous post, I told you about the gauge swatch, what it is and how it is made. And I even gave you some vocabulary that will be very useful for you to understand the gauge section in a Spanish pattern. Today I want to tell you why it is very important to make the gauge swatch and what you can do if you don’t get it as the pattern asks you. Why it is so important to make a gauge swatch? Make a gauge swatch before starting a crochet project is very important whether: 1- You are going to follow a pattern from a designer, or   2- You are going to design or create your own garment, accessory, or any crocheted item.   In the first case, it is very important that you make the gauge swatch as indicated by the designer, using the recommended yarn and hook. She/he may ask you to make the swatch flat or circular (depending on what is needed for the pattern), and she will also tell you what stitch to use in the swatch.  In some cases, you will be asked to block it and in others not, it depends on the design and the designer.  What it will always tell you is the number of stitches and rows/rounds that you must obtain in 10 x 10 cm, or what is the same in 4 x 4 inches.  I insist that it is very important to make the swatch because if you do not do it and your tension using that yarn and hook does not match the designer’s, the final result will not be as expected. To help you understand me better, imagine that your tension when crocheting is looser than the designer’s, therefore, you will have more stitches in 10 cm if you use the same hook as the designer.  One more stitch is not usually a problem, but for a garment with a circumference of several cm, it will not be just one stitch, but several, and the garment will be bigger. The opposite can also happen, and the garment may be too small. Or the garment will have no drape or too much drape. In case you are going to design something, if you make your gauge swatch you can see how the fabric you are creating will look like, and if you like it tighter you will make the sample with a thinner hook. If, on the other hand, you want it looser, you change and make a swatch with a thicker hook. In the swatch, you can use different stitches and see how they look together, the same with the color combination. It will help you not only to get the calculations you need, but also to see if that idea you have works and looks good. Calculations are very important, if you have the final gauge swatch, and you measure the stitches and rows that fit in 10 cm with this information and with the help of my Crochet and Knit Calculator you can very easily calculate the number of stitches you need for a given width, the same with the rows/rounds. And this way you save yourself from frogging. What to do if my gauge does not match? When you make a gauge swatch that you are asked for in a pattern, you do it with the hook that the designer recommends. But you don’t necessarily have the same tension when crocheting as the designer and in some cases the yarn you use, even though it is very similar, doesn’t behave the same way. Then it happens that when you measure the stitches and rows that fit into the central 10 cm of your swatch, you don’t get the same number as the pattern asks for. If you do not get the same number of stitches or rows, but you continue and make your project, it will not fit the measurements specified in the pattern. It may be too big or too small, with the stitches too tight or loose, and with no drape or too much drape. What to do when this happens? -When you get more stitches or rows than the pattern asks for in 10 cm, you should change to a slightly thinner hook and redo the swatch to see if you get the desired number of stitches. -If, on the other hand, you get fewer stitches, then try a thicker hook. You may have to undo and redo the swatch several times, but with experience, it will be easier to know which hook to switch to. And when you have a swatch that gives you the same number of stitches and rows/rounds as the pattern, you can start !!!!. Save this Post If you liked this post and found it useful, share it so that your friends and other crocheters can benefit from it as well. If you’re on Instagram, find me THERE, I’d be happy to meet you. Add Your Heading Text Here All Post Crochet ¿Why it is so important to check gauge? 2 de February de 2022/No Comments In a previous post, I told you about the gauge swatch, what it is and how it is made. And… Read More Understand Care Symbols in Yarn Labels, in English and Spanish 8 de December de 2021/No Comments Surely you have been frustrated by not understanding the care symbols that are on your yarn label.  In this post… Read More Yarn Weights and how to say it in Spanish 6 de October de 2021/No Comments You love to crochet, but you’re a little confused about choosing yarn for a project because you don’t know the… Read More Load More End of Content.

¿Why it is so important to check gauge? Read More »

simbolos cuidado

Understand Care Symbols in Yarn Labels, in English and Spanish

Surely you have been frustrated by not understanding the care symbols that are on your yarn label.  In this post I explain them to you and tell you what they mean in English and Spanish, so that you will always know how to take care of the garments you crochet or knit. Care Symbols Washing You can also find this symbol related to washing with a number inside. That is to tell you the water temperature. Drying There are some other symbols regarding drying without a machine.   Ironing Bleaching *If you want to Understand your Yarn Labels CLICK HERE These are some of the symbols that we find most often on the yarn labels, keep them in mind so you can take good care of the garments you crochet or knit from now on. I hope this post has helped you and if you want to help others you can share it!! Are you on Instagram? If so, Find there!     Have a good crochet time!!! Save this Post in Pinterest

Understand Care Symbols in Yarn Labels, in English and Spanish Read More »

entender etiqueta de lanas

How to understand your yarn label in English and Spanish

Most of the yarns you buy have a label, and understanding all the information on the label is essential. On the label you can see information about the materials of which the yarn is composed, the gauge, the crochet hooks recommended, the color and dye lot of the yarn, the care it requires, the amount of yarn it comes with and more.     All brands do not put the same information on labels, nor do they have the same way of putting the information about yarn.     Let’s take a closer look at what you can find on the label of your yarn ball.       Composition: It tells you the composition of your yarn, what materials it is made of and is usually shown in percentage (For example: 100 % Wool or 50 % Wool and 50 % Cotton).   Yarn Weight: It shows the thicknes of the yarn. Some brands also show the WPI or wraps per inch. (For example: DK or Fingering).    You must remember that depending on the origin of the yarn the denomination can be different, ussually in Spanish there are no standards for that like in English.   *If you want to know more about Yarn Weight in Spanish Click Here * To know more about WPI CLICK HERE     Weight/Length: This section shows you the amount of yarn in your yarn ball and its weight. The weight can be given in grams or ounces and the length can be given in meters or yards. Depending on the country of origin of your yarn it will be given in grams (gr) and meters (m) or in ounces (oz) and yards (yd).   Laundering Instructions: It would be the necessary information to take care of your crochet garments in the right way. In other words, it tells you how to wash it by hand or by machine and how to dry it.        There are some yarns that are Superwash, which in other words can be machine washed and can be machine washed because they have been treated with chemicals to make them stronger and machine washable. It also tells you whether the garment can be ironed or dry cleaned.     * If you want to know how to take care of your crocheted garments CLICK HERE   Hook/Needle: On the label you can see the gauge where it tells you how many stitches and rows fit in 10 cm or 4 in. This information is just to guide you a little. (Always take the time to make your gauge before you start your project, it is very important to get the right result) usually it gives this information for both knitting needles and crochet hooks.   Color and Dyelot: This refers to the color of the yarn. They come on the label with a color number and the dye lot number.      When buying yarn for a project you should buy all the skeins you need because even if it is the same color if they are from a different dyelot the shade may vary a little.               Important Vocabulary to Understand Yarn Labels Now you have all the information you need to understand the label on your yarns. It’s time to pay attention to the information on the label, whether it’s the yarn you already have at home or the yarn you’re going to buy in the future. I hope this information has been useful for you. If you have any questions you can ask me, I will be happy to help you. SAVE THIS POST Are you on Instagram? If so, Find me there!   Enjoy your Crochet time!

How to understand your yarn label in English and Spanish Read More »

WPI

¿What are the WPI?

WPI stands for Wraps Per Inch. And you may wonder what is it and why you need to know about it. Very simple, this is a system that allows you to know the ga approximate yarn weight by checking how many wraps of yarn fit in one inch or 2.5 cm, I prefer to do it in inches because I find it more accurate. What is the purpose of knowing the WPI of a yarn? Surely you’ve had a yarn that you don’t know its weight, and you want to know if you can use it for a certain project. You bought a pattern, and it asks for a yarn that you don’t have, but it tells you the WPI of the yarn you should use. If you know the WPI of the yarn you have, you will know if you can use it or not. How do you know how many WPIs a yarn has? There is only one way, but you can use several tools to do it. You should take a ruler (or anything that has 1 inch measurement) and wrap it loosely around the yarn within the measurement corresponding to one inch or 2.5 cm. If you don’t have a ruler or want to use a tool just for that, you can take any object, for example a pencil, and mark with tape or anything else the space that measures one inch. Clearly you will need a ruler or tape measure to measure, but only the first time. Then you know that there is one inch in that space. There is a tool that already comes for this, it is basically a small ruler with the measurement of 1 inch. They are very nice but not essential to know the WPI. I use the ruler to measure the samples and the hook measurements to do it. How to Know your Yarn Weight depending on how many WPI it has. This is a very simple method, I promise it will get you out of a lot of trouble. Tell me what you think, have you used it before? If you want to know more about yarns: *6 Types of Yarn Packaging *Yarn Weights and how to say it in Spanish Save it for Later

¿What are the WPI? Read More »

aguja-crochet-ganchillo

What materials are crochet hooks made of and which one is best for you?

In crochet hooks, as in almost everything in life, there is a lot of diversity. There are hooks of many sizes, of different shapes, of different prices and made of different materials.  I want to tell you a little about the materials that your hook can be made of, and above all give you some information about each one, so you can choose which one is the best for you and for your current project. Table of Contents What materials is the crochet hook made of? Pros and Cons of each material. Materials your crochet hook may be made of, in Spanish, and why you should know about it What materials is the crochet hook made of? There are crochet hooks made of different materials such as aluminum, steel, plastic, acrylic, bamboo, wood, glass … And you may even find that there are some made of bone or ivory, of course they are some of the most expensive ones. Let’s see below some characteristics of some of them, so you can keep them in mind while choosing the right one for you or your budget. Pros and Cons of each material. Metals Pros: Aluminum hooks are the most readily available and used by most crocheters, especially beginners. On the other hand, the antique hooks are made of steel or other metals. They are quite inexpensive hooks and are also very light, which makes them highly recommended if you are trying to maintain fabric tension and stitch uniformity. Crochet hooks made of aluminum or any other metal tend to slide better while crocheting, in other words, it does not get stuck with the yarn and on the contrary it slides very well. This feature makes you can crochet a little faster than with hooks made of other materials. They are very light hooks, which makes them very useful. Aluminum hooks are usually a very good option if you want to move faster on your project, if you are working with a yarn with many textures that would be more difficult to work with a hook made of a different material than aluminum, or if you simply like to crochet with hooks where the yarn slides more easily. Cons: Because they are made of metal they are less flexible and more likely to cause pain in your wrist, and if you already suffer from pain or damage to your hands they are not recommended. Another problem would be that the metal hooks if not stored and cared for properly can have rust, I have some very old ones that were my grandmother’s, and they are quite rusty. The aluminum ones that I have are very well and without rust, I prefer them to the steel ones that are older. Acrylic/ Plastic Pros: Plastic hooks are very easy to find lately and also quite inexpensive. They are also quite flexible and therefore good for your hands. They also have the characteristic that the yarn slides very well on them, although not as well as on aluminum hooks. I would say that this ability to slide the yarn on them in the case of plastic ones is between aluminum and wood or bamboo. Of course, this also depends on the yarn we are using in each case. There are conventional size and jumbo size. The later ones are light in spite of their size because they are hollow inside. Cons: The plastic causes friction and static which can affect some fibers. Depending on the friction, it can even felt the wool a little. Wood/ Bamboo Pros: Bamboo hooks have the characteristic of being light and feel warmer in your hands than those made of other materials such as aluminum. Cons: They are used to work with thicker yarns and have the characteristic that the stitches do not slide much. For beginner crocheters they are not recommended, although it is all a matter of taste and practice. There are not usually small diameter hooks, they are usually thicker. And the hooks that are made of harder woods or precious woods are usually quite expensive. Materials your crochet hook may be made of, in Spanish, and why you should know about it You already know that my mission is to teach you how to crochet patterns in Spanish, even if you don’t know anything about this language. That’s why in every post I’m leaving you terms that will be useful when you are going to crochet a pattern in Spanish and in this one you can’t miss them.  And you may wonder why you need to know the materials your hook is made of, in Spanish, the answer is very easy: In some patterns, the designer may advise you to use a hook of a certain material to obtain a specific result or to make the process easier for you. I leave you then how to say the materials the crochet hook can be made of, in Spanish: Aluminio: aluminium Acero: steel Plastico: plastic Acrílico: acrylic Bambú: bamboo Madera: wood Vidrio: glass Hueso: bone Marfil: ivory Now that you know the materials used to make crochet hooks and the pros and cons of using each one, it’s time to practice with several of them to get your own experience. You already have the knowledge you need to choose the most suitable hook for your circumstances or your project.  I hope you have found this information useful and that you can now decide which hook is best for you for each occasion. Save this post on Pinterest for when you need it. Are you on Instagram? If so, Find Me there! Have a good crochet time!

What materials are crochet hooks made of and which one is best for you? Read More »

aguja-ganchillo

Inline or Tapered Crochet Hook, what is the best for you?

Table of Contents 2 Types of Crochet Hooks Benefits of using Inline Hooks Benefits of using Tapered hooks. How they are called in Spanish and why you need to know it. I’m sure you’re wondering what is this inline and tapered hook thing, I promise you it’s an interesting topic that you’ll like to know a little bit about. You may already know that the crochet hook has different parts and shapes and according to this they are classified as Inline or Tapered. What is the Point of the Crochet Hook? The point (part 1 in the photo above) of the crochet hook is the part we use to grab the yarn and make the loop. This is also the part that goes inside the stitches to pull the yarn through them. If you examine your hooks in more detail, you will see that they can have the point in two different ways. And also, the shape of the hook and the throat of the needle (part 2 in the photo above) varies from one hook to another. Taking all this into account, we can classify them into two types of hooks:   Inline: In this type of crochet hooks, the point is aligned with the rest of the hook. They also tend to have a more pointed tip and a deeper neck.   Tapered: In this type of hooks the point is not aligned with the rest of the hook, it is a little inclined. In this case the point is usually more rounded and the throat of the hook is not as deep as in the inline hook.    Crochet Hook Types Although there are some differences between them, it is true that it does not influence the final result very much. In other words, your finished project will look the same if you make it with an Inline hook or with a tapered hook. Their differences have more to do with the process and the comfort of the crocheter. Benefits of using an Inline Hook Benefits of using a Tapered Hook According to some crocheters it can help you work faster. It is very useful for working with yarns that easily split. As it has a rounded tip, it does not unravel fibers so easily. According to many crocheters, by using this type of hook you can avoid the pain in your wrist. This is due to the fact that since the throat of the hook is less deep, you have to make a shallower turn when making stitches, unlike the Inline needle which, having a deeper throat, requires you to make a greater turn with your wrist to make each stitch. All these pros and cons are very subjective, which in other words, maybe for other crocheters it works this way and for you it works differently. What I can assure you is that it is much easier to work with slip stitches if you use an Inline hook. It is also true that with time and experience we use the type that we prefer without knowing sometimes why. What they are called in Spanish and why you should know it In Spanish, it is referred to as follows:   Alineada: inline   No Alineada: tapered   And you may wonder why you should know how the hooks are called in Spanish. It’s very simple, if you are learning to crochet patterns in Spanish it is very useful to know this information. It may be the case that in a certain pattern you are advised to use an inline needle, for example, to make the ribbing, since they are made in slip stitches, and it is much easier that way.   In Spanish patterns, you will find this term mainly in the section of tips or advice they give you to get a better result. You might also find it in the materials section when they refer to the hooks you will need. Now you know it for when you are crocheting in Spanish and you find these terms that I have taught you. I hope you have found this information useful and that you can now decide which hook is best for you on each occasion, because you don’t always have to use the same type. Are you on Instagram, if so find me there! Have a good crochet time!

Inline or Tapered Crochet Hook, what is the best for you? Read More »

Foto de Anete Lusina en Pexels

5 Tips to improve your Yarn Tension

Tension, tension, tension… We hear all the time how importance is to get the right tension while crocheting a project. But when we are beginners it is no so easy, right? It was really hard to me when I started learning how to crochet. I think that a lot of people do not get to next step in learning because of tension. What is Tension? In case you still do not know the tension is simply how tight or lose our stitches are when we crochet. This is a briefly explanation so that it is easy for you to understand it. With the correct tension while crocheting all of your stitches are as similar as possible, taking into account that it is something handmade. Although some of us crochet thighter or looser than others we do not always crochet with the same tension. The best way to improve your tension is just practicing. Crocheting more and more your tension will get better and looking alike. Time cures all, my grandma said, and this is not the exception. How to improve your tension while crocheting 1- Hold always the needle in the same way when crocheting a project: The way you hold your needle while crocheting influences the tension in your stitches. I usually hold it a a pencil, but sometimes I hols it as a knife depending on the project. The best thing you can do to get a nice tension is to hold the hook the same way during the whole project, that is what I do. Remember that there is no wrong way to hold the hook. There are several ways to do it. You can watch these videos to learn How to hold your hook when crocheting But, remember that you have to choose the one that feels more comfortable for you. 2- Use the thread in the centre of yarn skein to crochet: Yarn is presented in different ways but it easy to use the ones in the form of a cake. These ones have the particularity of being more stable and it is mor difficult for them to roll around your room. This way, we can crochet in a more comfortable way using the thread in the centre on the cake.That makes our tension looking great. If the yarn that you have it is not presented as a cake you can make it by yourself, you can see this short videos to learn how to do it: How to make your own skein cake and How to crochet with a skein cake. 3- Correct posture when crocheting: Depending on the posture you take when crocheting your tension will be right or not. A wrong posture makes your neck and body hurts and that makes you change your tension too. Chose a comfortable place to crochet and a good posture too. 4- Enviroment and mood also influence in your tension. Your mood influences your tension . If you are stressed your tension changes and also if you are relaxed. It can happens that you start a proyect in a moment you are relaxed and later when you continue it you are stressed and your tension is not the same, it gets thighter sometimes. 5- Hold yarn the right way: We all have different ways of holding yarn and I also show you in a video some ways to do it: How to hold yarn when crocheting. But remember, choose the best option for you. Just take into account that the way you hold yarn influence in your tension. It can be thighter or looser. So, it is really important to hold yarn the same way during a whole project. Practice, practice, practice… Of course, the most important thing to do is practice. You have to crochet a lot to get a good tension in your projects. remember also that your crochet stitches will not look like someone else´s stitches. And inperfection in handmade items is what makes them perfect. I would really like to read your experiences and tips related to tension when crocheting, so, leave me a comment that I always read you.

5 Tips to improve your Yarn Tension Read More »

cuidado de prendas tejidas

How to Wash and Take Care of your Crocheted and Knitted Garments

I tell you how to take care and wash your crocheted or knitted garments. Our crocheted or knitted garments are a kind of trophy that makes us feel truly happy. They represent hours of work, unraveling many times because something went wrong or because we did not like it. We are really proud of ourselves when someone ask us who did the beautiful garment we are wearing and we can say that we did it. But after finishing our garments or when someone gave us something crocheted or knitted as a gift it is really important: how to wash them and how to take care of them. After many years crocheting my own clothes and now that I started designing new ones I realized how important is to take care of them while storing them or washing them too. I will give some good advices for you to take care of your crocheted or knitted garments and also how to store them too. How to wash them Things to keep in mind: Depending on the fiber you have used in your project it must be your care. Not all fibers behave the same way and that is something you need to know. Just see in the label of the fiber you used. It clearly states its composition and often tells you how to wash and care the garment. Some fibers are superwash, which means they can be machine washed and others can only be hand washed. Of course, if you are in doubt whether it can be machine washed or not just wash them by hand. I personally wash all of mine by hand, even if they are made with a superwash fiber. I do not like taking risks. Crocheted or knitted garments tend to deform easily when washed. That is why you must do it carefully. I will explain you step by step how to wash them and drying them so that the process is not to aggressive. Washing Do not wash them under the tap, do it in a container or basin with enough space to cover them with water. Use cold water( or as indicated by the manufacturer, which is often on the label). Use a liquid soap that is good for wool garments or a soap for delicate garments. Put a small amount os soap on water and stir it. Then put the garment inside and leave t for a while to absorb water. Wash it as carefully as possible without squeezing it. Rinsing • Rinse them with plenty of water so that no soap remains.  • Do not squeeze the garment to remove all the water, this will distort it. • If it is made of wool or a material that is rough or itchy on the skin, make a final rinse by putting fabric softener in the water. Drying  • To remove excess water from the garment before putting it to dry, put it on a towel and roll it up and squeeze a little so that the towel absorbs the water, but always without distorting the garment.  • It is time to put it to dry and we will do it horizontally. You will never hang your woven garments on the grocery store. • Put them on a horizontal surface, on a table or somewhere where it will lie flat and will dry without being damaged.   What to do if my garment is not dirty but I get itchy when wearing it I have a sweater that I received a s a presentand is very beautifull but makes me very itchy when wearing it. After doing a research I have found a solution and I want to share it with you. What I do is putting some fabric softener in a container with cold water. Then I put my garment inside and let it soak for 20 minutes. After that just take it out and let it dry as when you wash it, very carefully. Your garment will be really soft and comfortable when wearing it. How to store my knitwear Crocheted or knitted garments are delicate wheather they are made with natural or artificial fibers. That is you must take care of them more than you do with your other clothes. When storing them just fold them, never hang them on a hanger. When hanging them they will get deformed over time. You should look for drawers or shelves where to put them well folded, but in small groups of 4 or 5 garments. How to keep them smelling good Yiu should not wash your garments every time you use them if it is not necessary, this causes deterioration and color fading. Of course, if you are going to put them aside until next season you must do it after wash them. So that your garments always smell good you can put some lavender bag near them or some other bags with different kind of smell. Another thing you can do between washes is to spray them with a mixture of water and fabric softener. At a 50 cm distance spray your garment with this mixture and it dry. This keep them smelling really well. I hope all this tips help you while taking care of your garments, even If you made them or received as a gift. To finish, I want to give you an extra TIP: If you make a garment to give it as a presents to someone that does not know nothing about it, it is better to make them in acrylic or fibers that do not need too much care as the superwash ones. Of course you can give them good recomendations on how to take care of them. You do not want to spend many hours making a garment to get it felted because someone washed with hot water. Tell me about your experiences and tips while taking care of your crocheted or knitted garments. All I know is because I saw it in

How to Wash and Take Care of your Crocheted and Knitted Garments Read More »

ETIQUETAS PARA MARCADORES DE PUNTO

HOW TO MAKE STITCH MARKER TAGS + FREE PRINTABLE

If you read my previous post you will know my story with stitch markers. You will know that now I always use them because all the benefits they have. I use them in my creative process, while designing and crocheting.. I do not know why, but every time I am making a big foundation chain, for example, someone want to talk to me or I receive a phone call. That is the moment in wich you have to start counting again… I do not like that. That is why I bring you something really amazing: Tags for Stitch Markers. I made this printable with Tags for you to put them into your stitch markers. Just need to laminate it, cut them, open a small hole with a tapestry needle and put the tag into the Stitch Marker, that is all! There are different kinds of Tags: For inc and dec: To use place the marker in decreassings or increasings. That way you do not need to worry about counting, with the marker you will know where to inc or dec easily. With hook sizes: That way when you put apart a project you place the tag and when you come back to it you will know which hook you were using before. With numbers : 10, 20, 50, 100: To place them while making chains or for counting rows or stitches. I also leave some tags without numbers or letters so that you can use them as you want. I will appretiate if you leave me a comment telling me if you used them or if you ahve any other tip for stitch markers. Thanks for reading! Here you have your free printable with Tags for your stitch markers Also I leave you here a Youtube Video with the whole process: Te leo en los comentarios!

HOW TO MAKE STITCH MARKER TAGS + FREE PRINTABLE Read More »

Shopping Cart
error: Content is protected !!